Turbocharger fault diagnosis is essential to identifying and addressing the root cause of engine problems. Proper diagnosis ensures effective repairs and prevents further damage.
- Purpose of Fault Diagnosis: To pinpoint the source of engine failures and resolve the issue effectively.
- Avoid Premature Replacement: Do not replace the turbocharger before diagnosing and solving the underlying issue to prevent damaging a new turbocharger.
- Consistent Diagnosis Methods: Fault diagnosis procedures for turbocharged engines are similar to those for non-turbocharged engines.
- Disassembly Warning: Avoid disassembling the turbocharger during diagnosis, as this can hinder accurate fault identification.
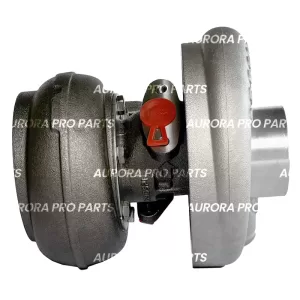
Pro Tip: If the turbocharger’s rotor rotates freely and there are no blade scratches, it indicates the turbocharger is in good condition.
Key Measurements to Check
- Axial Movement: Should not exceed 0.15mm.
- Radial Gap: Should be less than 0.10mm.
Common Turbocharger Failure Causes
- Assembly or Manufacturing Defects: Issues due to improper assembly or manufacturing flaws.
- Incompatibility: Mismatch between the turbocharger and engine specifications.
- Low-Quality Engine Oil: Poor oil quality can damage the turbocharger.
- Foreign Object Ingress: Debris entering the turbocharger can cause severe damage.
- Excessive Temperatures: Overheating can lead to burned components.
Troubleshooting Turbocharger Problems
1. Engine Lacks Power
- Check the air filter for blockages.
- Inspect the piping for leaks in the turbocharger or engine.
- Verify the condition of turbocharger bearings; check axial and radial rotor clearances.
- Look for excessive carbon build-up behind the turbocharger housing.
- Assess for turbocharger damage.
2. Noise Issues
- Inspect for turbocharger damage.
- Check for air leaks in the pre-turbine exhaust.
- Look for a broken turbocharger bypass valve diaphragm.
- Verify oil pump performance and ensure proper pre-oil levels.
- Avoid excessive acceleration during the initial start.
- Check for carbon or sludge build-up in the center housing.
- Clean the impeller and inspect for dirt or damage.
- Inspect the turbine housing for damage or restrictions.
3. Oil Leaks
- Check for turbocharger damage.
- Ensure the air filter element is intact and not leaking.
- Inspect the inlet and exhaust manifolds for leaks.
- Verify the crankcase fluid level and pressure.
- Check for blockages in the crankcase pipe or boost pipe.
- Limit prolonged idling time.
4. Black Smoke Emission
- Inspect for turbocharger damage.
- Check for blockages in the inlet manifold.
- Assess the injector system for wear or damage.
- Investigate potential engine damage.
5. Blue Smoke Emission
- Look for turbocharger oil leaks.
- Ensure the air intake system is not plugged.
- Check the crankcase oil-gas separator for failure.
- Verify if oil and gas are entering the cylinders and burning.
- Inspect for engine damage.
6. Excessive Oil Consumption
- Investigate turbocharger damage, which may cause mechanical friction noise.
- Ensure the turbocharger compatibility with the engine.